Introduction
Imagine standing before a sea of carefully raked gravel, its rippling patterns suggesting water frozen in time. Fifteen weathered stones rise from this ocean of white, arranged in groups that seem both random and inevitable. Moss clings to their bases like tiny islands. No flowers distract the eye. No fountains break the silence. Yet within this apparent emptiness, you sense profound fullness—a stillness so deep it resonates in your bones.
This is the power of the Japanese Zen garden.
Unlike the lush, colorful gardens of Western tradition, Japanese Zen gardens (known as karesansui 枯山水, literally “dry landscape”) achieve beauty through radical simplification. These austere compositions of stone, gravel, moss, and occasionally pruned trees or shrubs create spaces for meditation, contemplation, and the direct experience of nature’s essence distilled to its purest form.
Zen gardens emerged in medieval Japan, developed by Buddhist monks as three-dimensional expressions of Zen philosophy and aids to meditation. Yet their influence extends far beyond monastery walls. Today, these gardens appear in museums, corporate campuses, and private homes worldwide—their timeless principles offering sanctuary from our chaotic, overstimulated modern lives.
The famous rock garden at Ryōan-ji Temple in Kyoto, created around 1500, attracts over a million visitors annually, each seeking to penetrate its mystery: fifteen stones arranged so that from any viewing angle, at least one remains hidden. Why? The garden itself answers with silence.
But Zen gardens are more than aesthetic artifacts to admire. They are participatory art forms—spaces that transform those who enter them, tools for cultivating presence and insight, and invitations to experience reality directly rather than conceptually. As landscape architect Marc Peter Keane writes: “The garden is not just something to look at—it is something to be experienced” (Keane, 1996, p. 11).
This comprehensive guide will take you deep into the world of Japanese Zen garden design. You’ll discover:
- The historical development from Chinese influences to distinctly Japanese forms
- The profound symbolic language of stones, gravel, water, and plants
- The essential design principles that create contemplative power
- Famous gardens and what makes them masterpieces
- Detailed instructions for creating your own full-scale outdoor garden
- A complete guide to designing desktop miniature gardens
Whether you have acres of land or just a corner of your desk, whether you seek spiritual practice or aesthetic beauty, the principles of Zen garden design offer a path to creating spaces of profound tranquility and meaning.
Let us enter the gate and walk the path together.
The History and Evolution of Zen Gardens
Ancient Roots: Chinese Influence
The story of Japanese Zen gardens begins not in Japan but in China, where the art of landscape design had flourished for millennia.
Chinese Gardens (circa 200 BCE onwards): Chinese garden design emphasized recreating natural landscapes in miniature—elaborate compositions featuring ponds, streams, bridges, pavilions, and carefully placed rocks representing mountains. These gardens embodied Daoist principles of harmony between humans and nature, often incorporating symbolic elements from Chinese cosmology.
When Buddhism arrived in Japan from China via Korea in the 6th century CE, it brought not just religious teachings but also aesthetic sensibilities, including garden design principles. Early Japanese temple gardens closely imitated Chinese models, featuring ponds, islands, and elaborate plantings.
The Influence of Zen Buddhism: Zen Buddhism (禅, Zen from Chinese Chan) arrived in Japan during the 12th-13th centuries, brought by Japanese monks who had studied in China. Unlike other Buddhist schools with their elaborate rituals and complex philosophies, Zen emphasized direct experience, meditation practice, and sudden awakening to one’s true nature.
This radical simplicity transformed Japanese culture—including garden design. As Zen scholar D.T. Suzuki observed: “Zen has been a creative principle of the Japanese arts and crafts and to a certain extent of the Japanese way of life in general” (Suzuki, 1959, p. 16).
The Muromachi Period (1336-1573): The Birth of Karesansui
The distinctive Japanese Zen garden emerged during Japan’s Muromachi period, an era of political turmoil yet extraordinary cultural flowering.
Muso Soseki (1275-1351): The Pioneer
The monk and garden designer Muso Soseki is credited with creating some of Japan’s first karesansui gardens. Appointed abbot of Tenryū-ji Temple in Kyoto in 1339, Muso designed gardens that began moving away from Chinese pond-and-island models toward something more austere and meditative.
Muso’s innovation was to suggest water without using actual water—raked gravel patterns representing rivers and seas, carefully placed stones evoking mountains and islands. This abstraction reflected Zen’s emphasis on essence over appearance, pointing directly to the mind’s nature rather than creating literal representations.

Portrait of Musō Soseki Painted and Inscribed by Mutō Shūi 14th century (Muromachi period) Collection of Myōchi-in Temple | Important Cultural Property
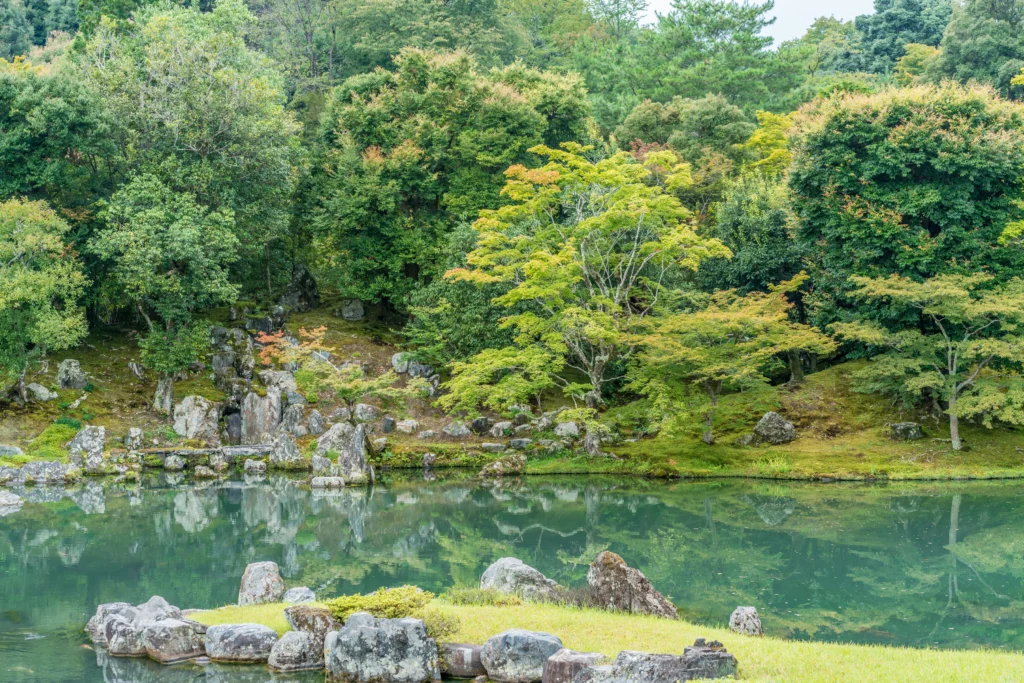
Sogenchi Garden at Tenryu-ji Temple Arashiyama, Kyoto
The Golden Age: 15th-16th Centuries
During the late Muromachi period, Zen garden design reached its apex. Several factors contributed:
- Zen Patronage: Powerful shoguns and nobles patronized Zen temples, funding elaborate garden construction
- Tea Culture: The development of tea ceremony (chanoyu) under masters like Sen no Rikyū emphasized wabi-sabi aesthetics—finding beauty in simplicity and imperfection
- Artistic Integration: Zen gardens began incorporating principles from other arts—ink painting, poetry, calligraphy—creating unified aesthetic visions
The Ryōan-ji Garden (circa 1500):
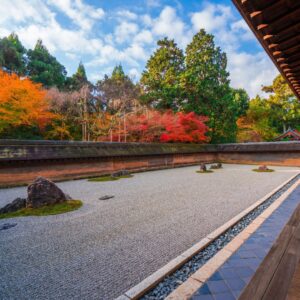
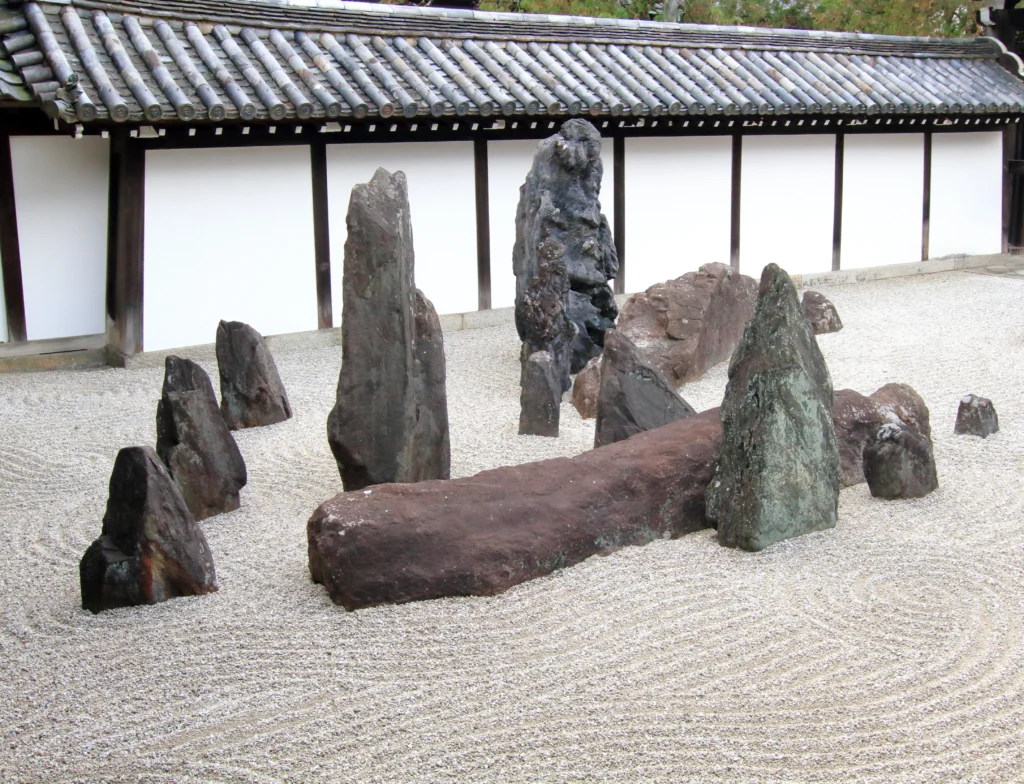
The most famous Zen garden was created around 1500 at Ryōan-ji Temple in Kyoto. This masterpiece consists of fifteen stones arranged in five groups across a rectangular expanse of white gravel, surrounded by an earthen wall topped with tile.
The designer remains unknown (variously attributed to Zen master Tokuho Zenketsu or the artistic gardener Soami), yet the garden’s power is undeniable. Its composition embodies mathematical precision yet appears completely natural. The fifteen stones are arranged so that from any viewing position on the veranda, at least one stone remains invisible—a deliberate metaphor for the incompleteness of perception.
As garden historian Gunter Nitschke notes: “Ryōan-ji is considered the ultimate achievement of the karesansui style…It is the quintessence of Zen garden art, refined to a point where nothing can be added or taken away” (Nitschke, 1993, p. 166).

The Dry Landscape Garden (Karesansui), Ryoan-ji Temple UNESCO World Heritage Site
The Edo Period (1603-1868): Diversification and Popularization
During the long Edo period peace, Zen garden design diversified. While karesansui remained important, other styles emerged:
Tea Gardens (Roji): Rustic paths leading to tea houses, emphasizing natural materials, irregular stepping stones, and the wabi-sabi aesthetic of intentional rusticity. These gardens served as transitional spaces, purifying visitors before tea ceremony.
Stroll Gardens: Large estates featured gardens meant for walking and viewing from multiple perspectives, incorporating ponds, bridges, and seasonal plantings while maintaining Zen principles of simplicity and natural harmony.
Symbolic Gardens: Gardens increasingly incorporated specific symbolic references—the Eight Immortals, famous Chinese landscapes, Buddhist cosmology—while maintaining meditative qualities.
Modern Revival and Global Influence
In the late 19th century, Japan’s forced opening to the West led to cultural exchange. Western visitors discovered Zen gardens with fascination. Books like Lafcadio Hearn’s Glimpses of Unfamiliar Japan (1894) and later D.T. Suzuki’s writings introduced these gardens to Western audiences.
The mid-20th century saw major revival:
- 1950s-60s: Designers like Mirei Shigemori created modern interpretations of classical gardens
- 1970s-80s: Global interest in Zen Buddhism and Japanese aesthetics spread garden principles worldwide
- 1990s-present: Contemporary landscape architects integrate Zen principles with modern materials and environmental consciousness
Today, Zen-inspired gardens appear globally—from the UNESCO headquarters in Paris to the Japanese Garden in Portland, Oregon, from corporate headquarters in Silicon Valley to private residences on every continent.
Related guide: our guide to visiting Zen temples in Kyoto

Shinwa-no-niwa (Garden of Heart’s Harmony) A masterpiece of modern Zen garden design by Mirei Shigemori, located within the serene grounds of Kosei-ji Temple, Kyoto.
The Symbolic Language of Zen Gardens
Zen gardens communicate through a sophisticated symbolic vocabulary. Understanding this language deepens appreciation and informs design.
Stones and Rocks: The Bones of the Garden
In Japanese garden design, stones are called ishi, considered the garden’s skeleton or bones. Their selection, placement, and grouping follow elaborate principles refined over centuries.
Primary Symbolism:
- Mountains and Islands: Large upright stones represent peaks; lower stones suggest foothills or islands
- Permanence and Stability: Stone embodies unchanging nature amid life’s flux
- Buddha Nature: In Buddhist symbolism, stone represents the eternal, awakened nature within all beings
- Natural Forces: Weathered, moss-covered stones show time’s passage and nature’s power
Types and Selection:
Garden designers traditionally categorize stones by:
- Shape:
- Taido-seki (体胴石): Tall, vertical stones suggesting cliffs or mountains
- Reisho-seki (隷書石): Low, horizontal stones suggesting worship or repose
- Shigyo-seki (思行石): Medium stones suggesting contemplation
- Character:
- Weathered vs. fresh-cut (weathered preferred)
- Moss-covered vs. bare
- Angular vs. rounded
- Color and texture variations
- Origin:
- River stones: smooth, rounded by water
- Mountain stones: angular, dramatic
- Volcanic stones: textured, powerful
- Each type carries specific associations and energy
The Art of Ishigumi (Stone Arrangement):
Placing stones is Zen garden design’s most critical and subtle skill. Traditional principles include:
The Three-Stone Foundation (Sanzon-seki): Most compositions begin with three primary stones forming a scalene triangle:
- Buddha stone (largest, principal): Represents enlightened awareness
- Attendant stones (two supporting): Represent wisdom and compassion
This triad creates dynamic balance—never symmetrical, always harmonious.
Grouping Principles:
- Odd numbers preferred (3, 5, 7, 15) – even numbers feel static
- Heights vary to create visual rhythm
- Stones “lean” in harmonious directions, suggesting natural geological forces
- Negative space between groups as important as stones themselves
The Hidden Rule: Master gardener Toshiro Inaji revealed: “Stones should be placed so they appear to have been there since before humans arrived, positioned by nature’s hand alone” (Inaji, 1998, p. 89). Artificiality defeats the purpose.
Famous Stone Arrangements:
- Ryōan-ji’s Fifteen Stones: Five groups (5-2-3-2-3 stones) creating mathematical yet natural composition
- Daisen-in’s Boat Stone: Single stone suggesting a boat navigating rapids (represented by raked gravel)
- Konchi-in’s Crane and Tortoise Garden: Stone groups shaped to suggest these longevity symbols
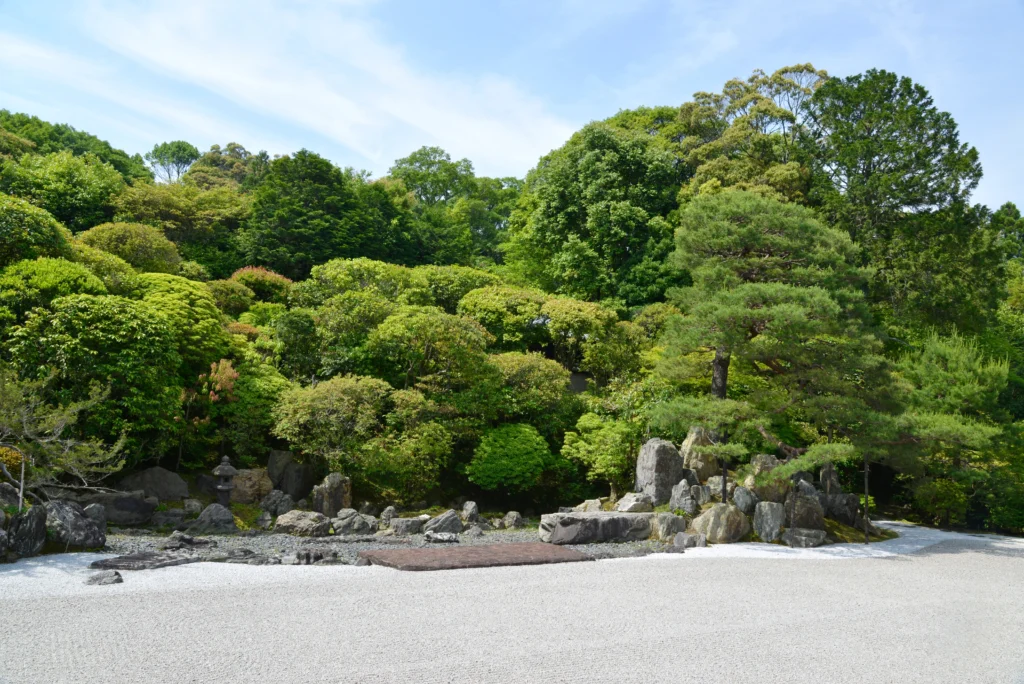
Tsurukame-no-niwa (The Crane and Tortoise Garden) Konchi-in Temple Garden, Kyoto Designed by Kobori Enshu
Related guide: kintsugi, where imperfection becomes art
Gravel and Sand: The Fluid Element
White gravel (suna 砂 or shirakawa-suna, literally “white river sand”) serves as canvas and content in karesansui gardens.
Primary Symbolism:
- Water: Raked patterns suggest flowing rivers, ocean waves, or still ponds
- Emptiness (Ku): The Zen concept of śūnyatā—open, spacious awareness
- Purity: White color suggests spiritual cleanliness and clarity
- Impermanence: Patterns constantly change with raking, embodying Buddhist teaching of anicca (impermanence)
Traditional Materials:
Shirakawa-suna: Decomposed granite from Shirakawa, Kyoto—the traditional standard. This gravel:
- Light grey-white color
- Angular particles hold raked patterns well
- Sized 2-5mm for optimal texture
- Weathers beautifully, developing subtle color variations
Alternatives:
- Crushed limestone (common in Western gardens)
- White marble chips
- Decomposed granite from local sources
- Fine grey gravel
Raking Patterns and Their Meanings:
The act of raking (samon 砂紋, “sand patterns”) is both maintenance and meditation.
Common Patterns:
- Parallel Lines (Sen-mon):
- Meaning: Still water, calm mind, infinite space
- Used: Around island stones, in open expanses
- Technique: Rake pulled in straight lines, evenly spaced
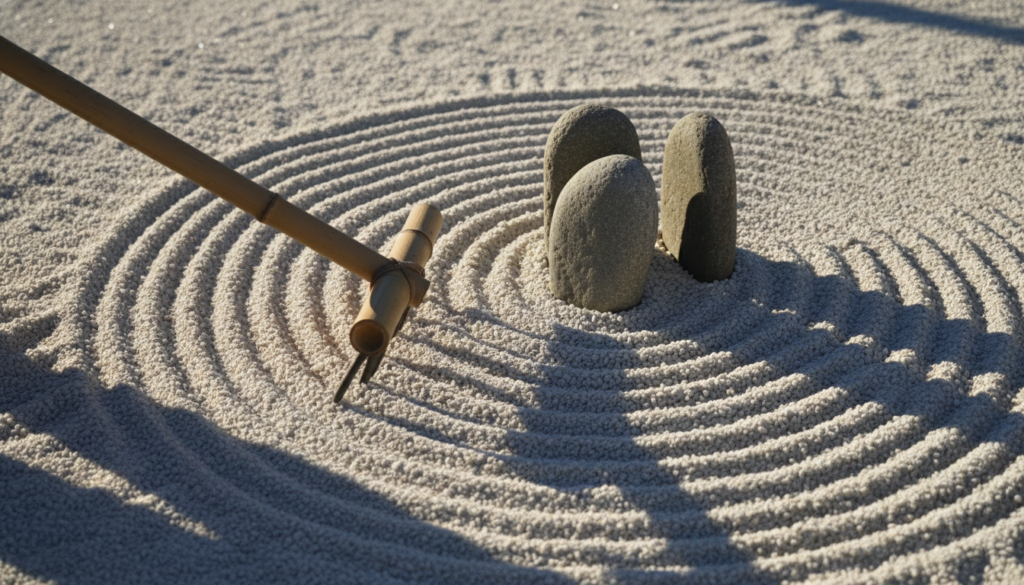
- Concentric Circles (Ichi-mon):
- Meaning: Ripples from falling raindrops, disturbance propagating
- Used: Around prominent stones
- Technique: Circular strokes around stone, spacing gradually widening
- Wave Patterns (Nami-mon):
- Meaning: Ocean waves, flowing river currents
- Used: Creating directional flow
- Technique: Gentle curves suggesting movement
- Combined Patterns:
- Where circular ripples meet linear patterns, creating visual dialogue
- Represents interaction between stillness and movement, form and emptiness
The Practice of Raking:
Daily raking serves multiple purposes:
- Maintenance: Smooths wind/rain disturbance, removes debris
- Meditation: Repetitive action quiets the mind
- Renewal: Each raking creates fresh patterns, embodying impermanence
- Participation: The gardener becomes co-creator with the garden
Zen monk and garden keeper Shunmyo Masuno notes: “When I rake the garden, I am not separate from the garden. The garden, the rake, the raking, and myself become one” (Masuno, 2001, p. 54).
Water: Presence and Absence
Interestingly, many Zen gardens contain no actual water—it’s represented through gravel and stone. Yet when water appears, it carries profound symbolism.
Dry Water (Karesansui): Suggested rather than literal water creates:
- Mental Engagement: Viewers complete the image mentally
- Essence Over Appearance: Points to water’s nature rather than its form
- Transcendence: Moves beyond literal representation to abstract truth
Actual Water (When Used):
Tsukubai (Water Basin): Stone basins originally for ritual purification before tea ceremony, featuring:
- Simple stone bowl
- Bamboo ladle
- Low placement requiring users to bow (humility gesture)
- Often inscribed with teaching: “Ware tada taru wo shiru” (我唯足るを知る) – “I know only contentment”
The famous tsukubai at Ryōan-ji contains this inscription arranged so the central square serves as the kanji 口 (mouth) completing each character—a puzzle teaching contentment.
Streams and Waterfalls: When included, kept simple:
- Natural stone arrangements
- Minimal manipulation
- Gentle sounds promoting meditation
- Seasonal awareness (ice in winter, lush flow in spring)
Plants: Living Presence
While karesansui gardens minimize or exclude plants, other Zen gardens use vegetation symbolically.
Moss (Koke): Moss holds special status in Zen gardens:
- Symbolism: Time, age, humility (grows low and quiet)
- Aesthetic: Softens stone, creates color variation, suggests natural aging
- Varieties: Over 100 moss species used traditionally
- Meaning: The famous moss garden at Saihō-ji Temple (Kokedera) features dozens of species, creating subtle green tapestry
Trees and Shrubs:
Pine (Matsu 松):
- Symbolism: Longevity, steadfastness (evergreen through winter)
- Use: Often heavily pruned to suggest age and windswept mountains
- Placement: Strategically positioned to frame views or suggest scale
Bamboo (Take 竹):
- Symbolism: Flexibility, resilience (bends but doesn’t break)
- Use: Screens, fences, single specimens
- Sound: Rustling creates auditory element
Japanese Maple (Momiji 紅葉):
- Symbolism: Impermanence, seasonal beauty
- Use: Controlled plantings for autumn color
- Placement: Often near water features
Cherry (Sakura 桜):
- Symbolism: Transience of life (mono no aware)
- Use: Sparingly in Zen gardens (more common in other styles)
- Meaning: Brief bloom emphasizes impermanence
Pruning as Art:
Japanese pruning techniques (niwaki 庭木) shape trees to:
- Suggest age (young trees appearing ancient)
- Create clouds of foliage
- Reveal branch structure
- Control size and form
Master gardener Kinsaku Nakane explains: “We don’t prune trees—we reveal their true nature” (Nakane, 1990, p. 112).
Related guide: Ikebana: The Japanese Art of Flower Arrangement and Its Zen Roots
Empty Space (Ma): The Unseen Element
Perhaps most important is what’s not present: ma (間), meaningful emptiness.
In Zen philosophy and aesthetics, ma represents:
- Potential: Space for possibilities to arise
- Silence: That which gives sound meaning
- Emptiness: Not void, but pregnant fullness
In gardens:
- Open gravel expanses create visual rest
- Gaps between stone groups allow each to breathe
- Unplanted areas invite contemplation
The balance of solid (stones, plants) and void (gravel, space) creates tension and harmony—too much solid feels cluttered, too much void feels barren.
Design Principles: Creating Contemplative Power
How do disparate elements—stones, gravel, perhaps some moss—create profound aesthetic and spiritual experiences? Through adherence to fundamental design principles.
Principle 1: Simplicity and Restraint (Kanso 簡素)
Core Concept: Achieve maximum effect with minimum elements. Every element must justify its presence.
Application:
- Subtraction: Remove everything unnecessary
- Essential Forms: Use basic shapes (triangles, circles)
- Color Limitation: Predominantly neutral palette (whites, greys, greens)
- Material Restraint: Few material types per garden
Avoid:
- Overcrowding with too many stones
- Multiple competing focal points
- Decorative elements lacking symbolic purpose
- Color variety that creates visual noise
Example: Ryōan-ji achieves extraordinary power with just fifteen stones and white gravel—nothing more needed.
Principle 2: Asymmetry (Fukinsei 不均斉)
Core Concept: Nature never produces perfect symmetry—asymmetric arrangements feel natural and dynamic.
Application:
- Odd Numbers: Group stones in 3s, 5s, 7s
- Triangular Composition: Scalene (unequal sides) not isosceles
- Varied Heights: Never uniform levels
- Dynamic Balance: Asymmetric yet harmonious
Avoid:
- Bilateral symmetry (feels artificial)
- Even numbers (static, complete)
- Equal spacing (mechanical)
- Centered focal points
The Golden Ratio: Many Zen gardens incorporate mathematical proportions (approximately 1:1.618) unconsciously through aesthetic intuition refined over generations.
Principle 3: Naturalness (Shizen 自然)
Core Concept: Arrangements should appear as if nature placed them, not humans.
Application:
- Geological Truth: Stone groupings suggest actual geological formations
- Growth Patterns: If plants present, follow natural growth habits
- Weathering: Use aged, weathered materials
- Organic Placement: Nothing looks “arranged”
Technique: Walk away from the garden and return with fresh eyes. Does anything look placed by human hand? If so, adjust.
Principle 4: Subtlety and Profundity (Yugen 幽玄)
Core Concept: Suggest rather than state explicitly—create mystery that invites contemplation.
Application:
- Partial Revelation: Some elements partially hidden (stones behind plantings)
- Depth: Layered compositions with foreground, middle ground, background
- Ambiguity: Arrangements allowing multiple interpretations
- Shadows: Use lighting (natural) to create mystery
Example: At Ryōan-ji, that one stone always remaining invisible from any viewpoint creates perpetual mystery—what you cannot see matters as much as what you can.
Principle 5: Stillness and Tranquility (Seijaku 静寂)
Core Concept: Create atmosphere promoting meditation and inner quiet.
Application:
- Enclosure: Walls or plantings creating sanctuary from external chaos
- Sound: Minimal or carefully chosen (water trickling, bamboo rustling)
- Color: Subdued, neutral palette
- Movement: Minimal (except seasonal changes, shadows)
Avoid:
- Bright colors
- Complex patterns
- Visual busy-ness
- Artificial elements (gnomes, decorative objects)
Principle 6: Forced Perspective and Miniaturization (Shakkei & Tsukiyama)
ore Concept: Create illusions of depth and incorporate distant scenery.
Application:
Shakkei (借景 – “Borrowed Scenery”):
- Frame distant mountains or trees as part of composition
- Use foreground elements to integrate background
- Create visual continuity between garden and beyond
Tsukiyama (築山 – “Artificial Hills”):
- Small mounds represent mountains
- Miniature landscapes suggest vast natural scenes
- Forced perspective makes spaces feel larger
Technique:
- Place larger stones in foreground, smaller in background (exaggerates depth)
- Use fine-textured plants distant, coarser ones near (enhances perspective)
Principle 7: Seasonal Awareness (Shiki 四季)
Core Concept: Garden changes with seasons, creating temporal dimension.
Application:
- Spring: Fresh moss growth, new leaves
- Summer: Lush greens, cooling visual effect
- Autumn: Maple color, falling leaves on gravel
- Winter: Snow on stones, bare branches, ice
Design Choice: Some gardens emphasize seasonal change (deciduous trees), others minimize it (evergreens, stone and gravel only).
The garden at Ryōan-ji changes dramatically with seasons yet maintains essential character—a lesson in constancy within change.
Related guide: the philosophy behind Zen temple architecture
Famous Zen Gardens: Masterpieces to Study
Understanding great gardens deepens design knowledge. Here are essential examples:
Related guide: our guide to visiting Zen temples in Kyoto
Ryōan-ji Temple, Kyoto (circa 1500)
Description:
- Dimensions: 25m x 10m rectangular space
- Elements: Fifteen stones in five groups across white gravel
- Viewing: From wooden veranda only (not entered)
- Wall: Earthen wall with aged patina
Design Genius:
- Mathematical precision yet organic feel
- Perpetual asymmetry (always one stone hidden)
- Extreme simplicity achieving profound complexity
- Multiple interpretations possible (tiger cubs crossing river, islands in sea, mountain peaks through clouds)
What It Teaches:
- Power of restraint
- Importance of negative space
- Mystery through incompleteness
Visit: Open daily, 8:00-17:00. Early morning recommended (fewer crowds)
Daisen-in, Daitoku-ji Temple, Kyoto (early 16th century)
Description:
- Small enclosed garden (approximately 100 square meters)
- Represents complete landscape: mountains, waterfall, river, ocean
- Narrative flow from mountain source to ocean destination
- Uses vertical stones as waterfall, horizontal gravel as river
Design Genius:
- Dynamic composition suggesting movement
- Narrative structure (journey from source to sea)
- Skillful use of perspective
- Integration with temple architecture
Symbolic Elements:
- The Boat Stone: Appears to navigate rapids
- The Turtle Island: Stone arrangement suggesting longevity
- The Treasure Ship: Distant grouping suggesting wealth arriving
What It Teaches:
- Storytelling through abstraction
- Creating movement in stillness
- Layered symbolism
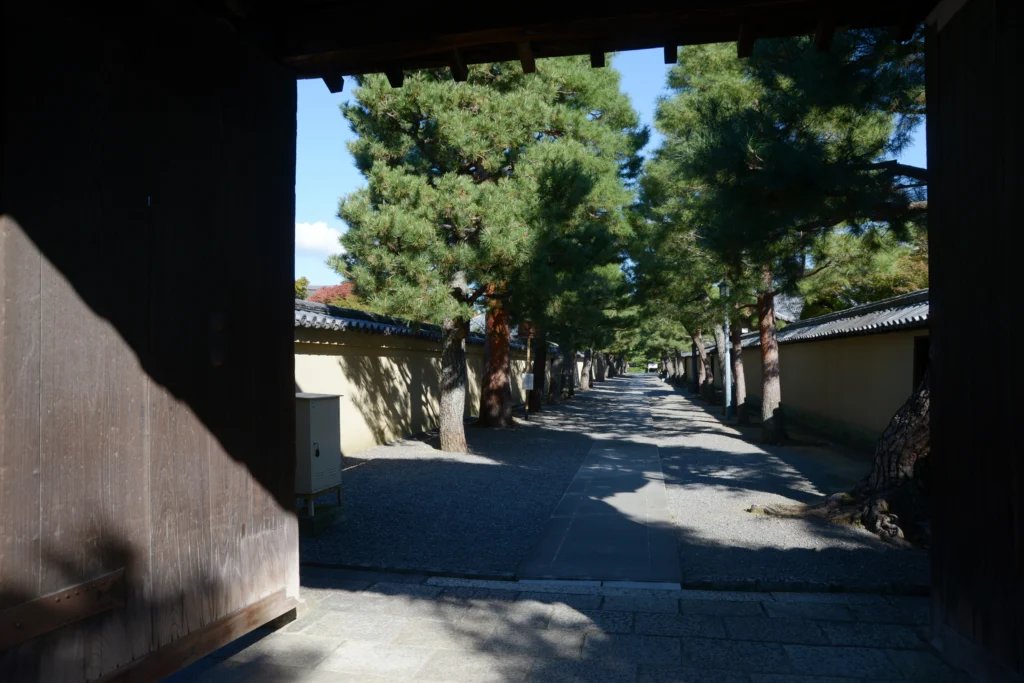
The Approach to Daitoku-ji Temple, Viewed from the South Gate Murasakino, Kita-ku, Kyoto
The Dry Landscape Garden (Karesansui) of Daisen-in Daitoku-ji Temple, Kyoto
Tōfuku-ji Temple Hōjō Garden, Kyoto (1939, designed by Mirei Shigemori)
Description:
- Modern interpretation of traditional forms
- Four gardens surrounding abbot’s quarters
- Each garden different character
- Combines traditional elements with modern abstractions
Design Elements:
- South Garden: Seven stones on raked gravel (Big Dipper constellation)
- West Garden: Checkerboard pattern of azalea squares and gravel
- North Garden: Checkerboard pattern of moss and cut stones
- East Garden: Cylindrical stones arranged like Big Dipper
Design Genius:
- Bridges traditional and modern
- Geometric abstraction maintaining Zen essence
- Multiple perspectives from different rooms
What It Teaches:
- Zen principles adapt to contemporary expression
- Boldness in innovation while respecting tradition
50Hojo Gardens, Tofuku-ji Temple Designed by Mirei Shigemori Kyoto, Japan
The Tsutenkyo Bridge: “The Bridge to Heaven” Tofuku-ji Temple, Kyoto A famous wooden covered bridge offering breathtaking views of the Sengyoku-kan valley, especially renowned for its spectacular autumn foliage.
Ginkaku-ji (Silver Pavilion) Temple, Kyoto (late 15th century)
Description:
- Stroll garden with famous sand formations
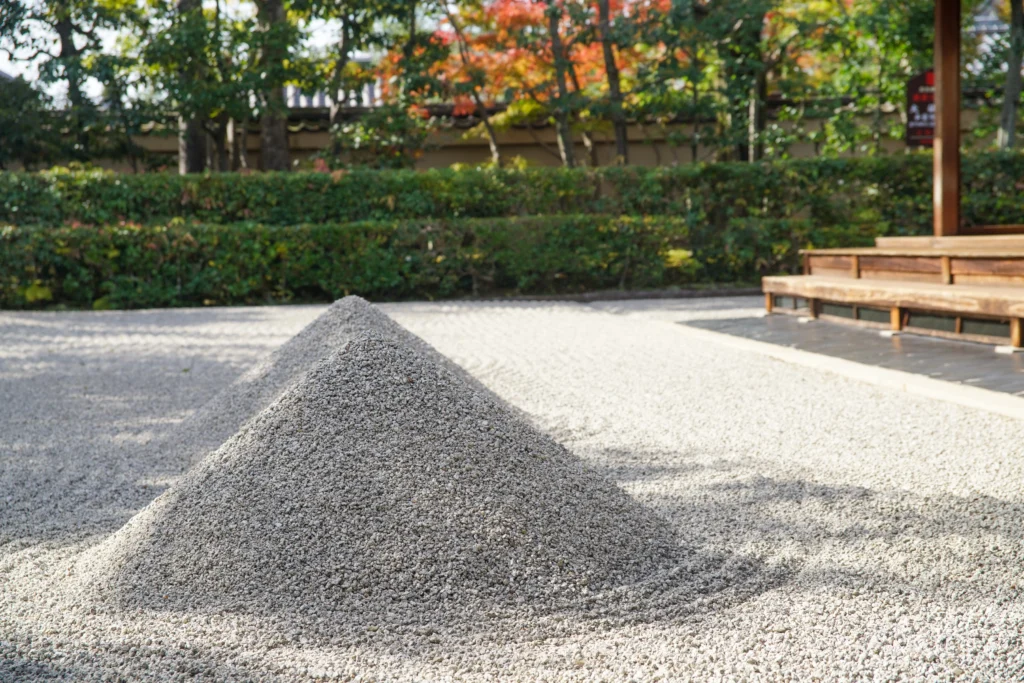
- Kogetsudi(向月台): Truncated cone of white sand (1.5m tall)
- Ginshadan (銀沙灘): Sculpted gravel sea with wave patterns
- Moss garden paths leading to hillside temple
Design Elements:
- Sand cone reflects moonlight into temple (traditional interpretation)
- Wave patterns suggest water in motion
- Integration of multiple garden types (dry landscape, moss, pond)
Design Genius:
- Three-dimensional sand sculpture
- Seasonal moon-viewing function
- Transition spaces between garden types
What It Teaches:
- Vertical elements in karesansui
- Functional and aesthetic integration
- Sculptural possibilities with sand/gravel
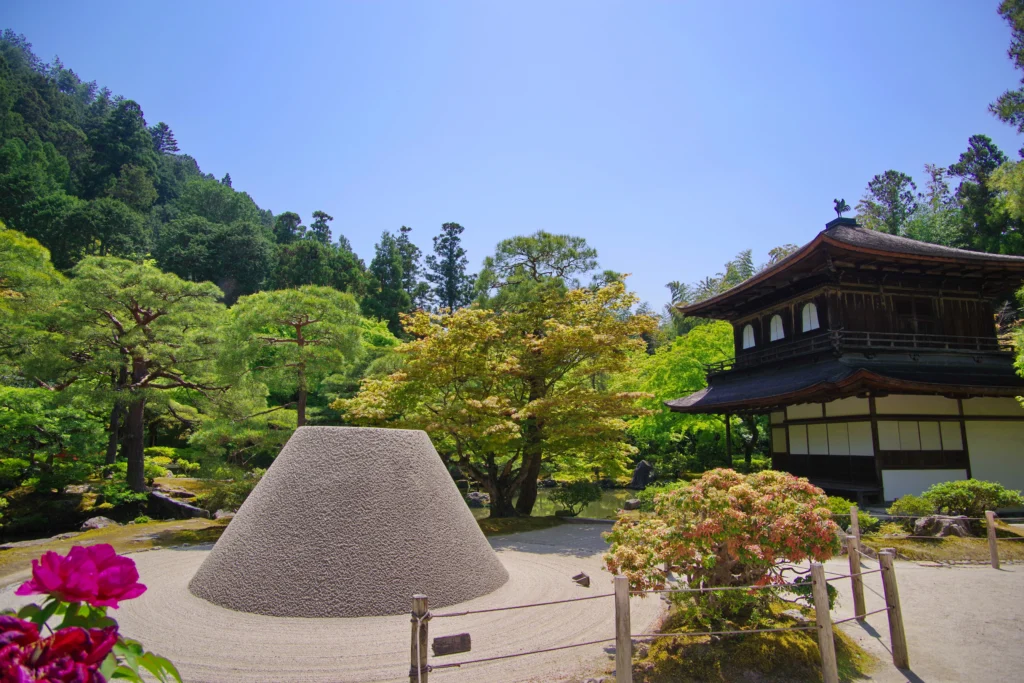
Kogetsudai: The Conical Sand Mound of Ginkaku-ji A meticulously maintained sand sculpture designed to reflect the moonlight. It stands as a centerpiece of the Zen garden at the Silver Pavilion, Kyoto.

Ginshadan: The Sea of Silver Sand A sprawling expanse of raked white sand designed to shimmer like the sea under the moonlight. Along with the Kogetsudai mound, it creates the iconic Zen landscape of Ginkaku-ji.
Portland Japanese Garden, Oregon, USA (1967, multiple designers)
Description:
- Western interpretation of Japanese garden principles
- 5.5 hectares on hillside
- Multiple garden types including Flat Garden (karesansui style)
- Uses Pacific Northwest materials
Design Elements:
- Indigenous stones (basalt, granite)
- Native plants alongside Japanese species
- Maintains authentic principles while adapting to locale
What It Teaches:
- Zen garden principles translate globally
- Local materials can embody universal principles
- Authenticity comes from understanding essence, not copying forms
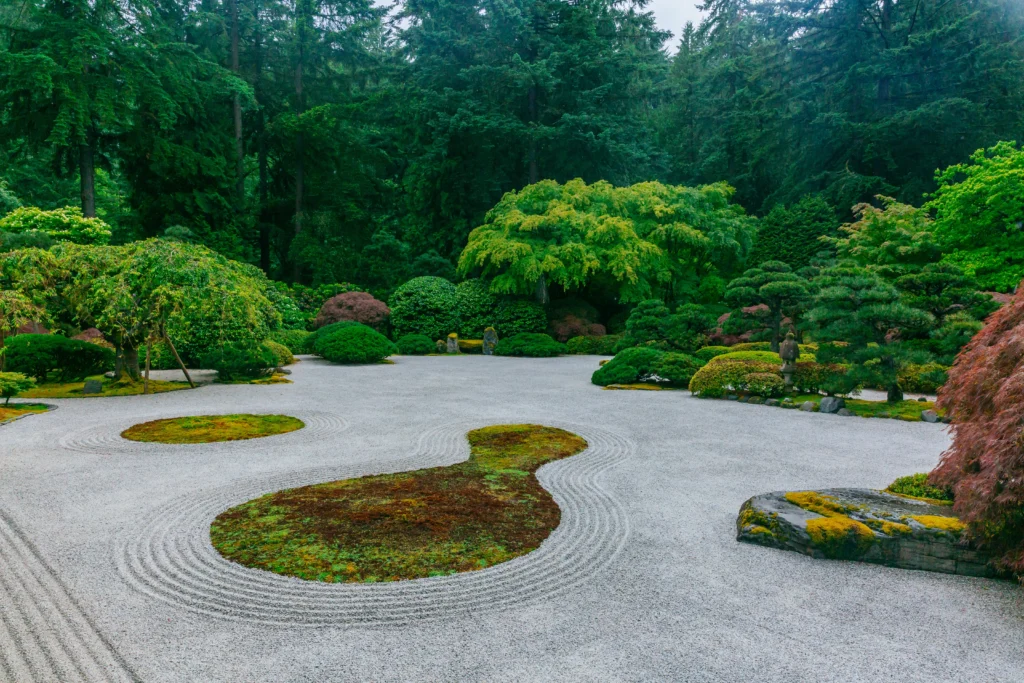
The Portland Japanese Garden (est. 1967) Renowned as one of the most authentic Japanese gardens outside of Japan. Spanning 12 acres in the hills of Portland, Oregon, it features eight distinct garden styles created through the collaborative vision of multiple master designers.
Related guide: Famous Zen Gardens in Kyoto: A Visitor’s Guide to Sacred Landscapes
Creating Your Own Outdoor Zen Garden
Now we move from theory to practice. Here’s how to design and build your own contemplative space.
Phase 1: Planning and Preparation
Step 1: Define Your Purpose
Before sketching designs, clarify intentions:
- Primary use: Meditation? Aesthetic enjoyment? Both?
- Viewing: From where will you primarily view it? (window, patio, walking through)
- Time commitment: How much maintenance can you sustain?
- Style: Pure karesansui (dry)? Or incorporating water/plants?
Step 2: Choose Your Location
Ideal Conditions:
- Visibility: Viewable from meditation space, living area, or dedicated viewing platform
- Enclosure: Can be walled or fenced for sanctuary feeling
- Sunlight: Partial shade to full sun (affects moss growth, gravel appearance)
- Drainage: Level or gently sloping ground (avoid low spots where water pools)
- Size: Any size works—Zen gardens adapt from 2m² to hundreds of square meters
Less Ideal but Workable:
- Heavy shade (limits moss varieties)
- Slopes (requires terracing or creative grading)
- High traffic areas (unless you want interactive garden)
Step 3: Measure and Document
- Accurate measurements: Length, width, any irregular boundaries
- Sun patterns: Observe at different times of day
- Existing features: Trees, structures, utilities to work around
- Photographs: From multiple angles and times of day
Step 4: Research and Inspiration
- Study famous gardens (virtually if cannot visit)
- Photograph local stone types available
- Sketch ideas without attachment to them
- Let inspiration develop over weeks, not hours
Phase 2: Design Development
Step 5: Create a Conceptual Framework
Ask yourself:
- What will the garden represent? (Mountains and sea? Abstract composition? Specific symbolism?)
- What feeling should it evoke? (Vast stillness? Dynamic flow? Intimate enclosure?)
- What principle dominates? (Simplicity? Mystery? Natural power?)
Example Concepts:
- “Islands in a sea of mist”
- “Mountain peaks through clouds”
- “River flowing to ocean”
- “Pure abstract composition emphasizing ma (emptiness)”
Step 6: Develop Base Plan
On graph paper or digitally:
- Draw accurate site boundaries
- Mark fixed elements (walls, buildings, trees to preserve)
- Establish viewing points (where people will see garden)
- Sketch rough stone placement (primary triangular groups first)
- Define gravel field (area of raked gravel)
- Note any plant locations (if including vegetation)
Design Tips:
- The 60-30-10 Rule: Approximately 60% gravel, 30% stone/plant mass, 10% other elements
- Sight Lines: Primary stone group visible from main viewing point
- Depth: Create foreground, middle ground, background even in small spaces
- Entry: If walkable, where does viewer enter/exit?
Step 7: Refine Stone Arrangement
This is the most critical design phase.
Stone Selection Criteria:
- Number: Start with 7-15 stones for medium garden (3-5 for very small)
- Primary Triad: Three main stones forming foundation
- Supporting Stones: Additional stones in subordinate groups
- Sizes: Variety from knee-height to waist-height for principal stones
Arrangement Method:
- Place largest stone first (this is the Buddha stone, primary element)
- Add two supporting stones forming scalene triangle
- Step back and evaluate from primary viewing point
- Add secondary groups maintaining odd numbers
- Create dialogue between groups through orientation, spacing
- Negative space between groups as important as stones
Testing:
- Live with the arrangement for days before finalizing
- View from multiple angles (not just primary viewpoint)
- Photograph to see with fresh eyes
- Ask: “If nature placed these, would they be here?”
Phase 3: Material Sourcing
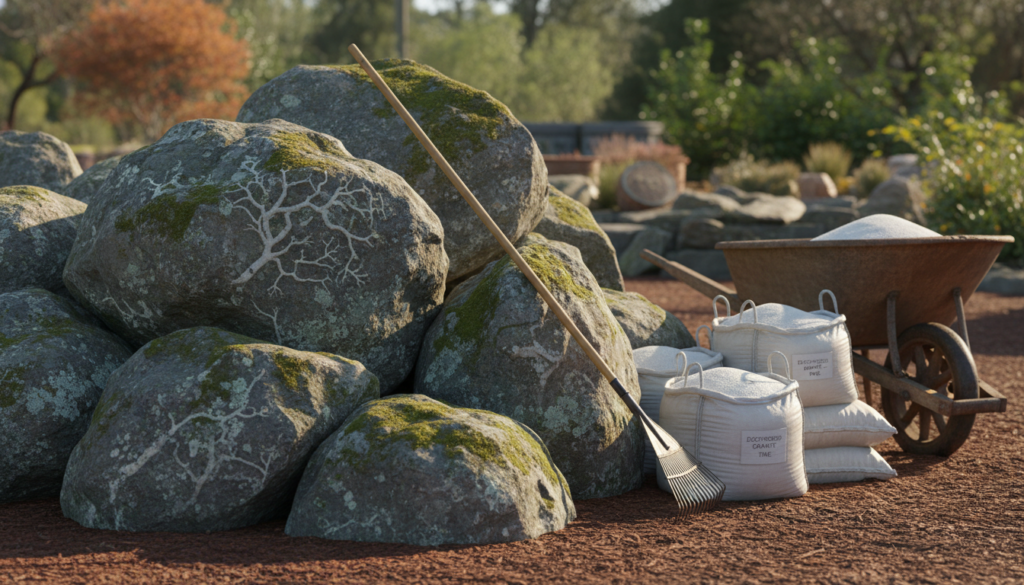
Step 8: Acquire Stones
Local Sources:
- Stone yards: Commercial landscape suppliers
- Quarries: Direct from source (often cheaper)
- Nature: If legal and ethical, collect from property or with permission
- Demolition sites: Weathered stones from old structures
Selection on Site:
- Weathered over new-cut: Look for moss, lichen, aging
- Character: Each stone should have personality, interesting faces
- Workability: Size/weight you can actually move
- Compatibility: Collect stones from same geological source for coherence
Typical Quantities: Small garden (10m²): 5-7 stones, 500-2000 kg total Medium garden (25m²): 10-15 stones, 2000-5000 kg total Large garden (50m²+): 15-25 stones, 5000-10000 kg+ total
Step 9: Acquire Gravel
Ideal Material:
- Decomposed granite: Angular particles, grey-white, holds raked patterns
- Size: 2-5mm (smaller too dusty, larger won’t rake well)
- Color: White, off-white, or light grey
- Depth: 5-7cm minimum for good raking
Quantity Calculation:
- Area in square meters × 0.06m depth = cubic meters needed
- Add 10% for settling
- Example: 20m² garden × 0.06m = 1.2m³, order 1.3-1.5m³
Alternatives by Region:
- North America: Decomposed granite (common), crushed limestone
- Europe: Gravel, crushed marble, light-colored local stone
- Australia: Decomposed granite, white sand
- Always source locally when possible (environmental, cost)
Step 10: Additional Materials
Edging:
- Purpose: Contains gravel, defines boundary
- Materials: Buried stones, wood timbers, metal edging
- Height: 5-10cm above gravel level
- Style: Should be subtle, nearly invisible
Weed Barrier:
- Essential: Prevents weeds growing through gravel
- Type: Commercial landscape fabric (water-permeable)
- Installation: Under gravel layer
Tools:
- Rake: Traditional Japanese kumade (claw-like) or garden rake
- Wheelbarrow: Moving gravel and stones
- Level: Ensuring proper base
- Tamper: Compacting base
- Safety equipment: Gloves, back support for moving stones
Phase 4: Installation
Step 11: Site Preparation
- Clear area completely:
- Remove all vegetation (grass, weeds, roots)
- Excavate to 10-15cm depth (for base layers)
- Remove large roots, debris
- Grade and level:
- Slight slope for drainage (1-2% grade)
- Smooth and tamp surface
- Check levels multiple times
- Install edging:
- Dig trench for edging material
- Set level or following contours
- Secure firmly (buried stones, staked wood)
- Lay weed barrier:
- Cover entire area including under future stone positions
- Overlap seams by 15cm
- Secure with landscape staples
Step 12: Stone Placement
This is the heart of garden creation—take your time.
Process:
- Review design plan but hold it lightly (be willing to adjust)
- Place primary stone:
- Position according to plan
- Bury base 1/3 to 1/2 of height (stability and natural appearance)
- Orient most interesting face toward primary viewing point
- Ensure stability (should not wobble)
- Slight lean creates dynamic (never perfectly vertical)
- Add supporting stones of primary group:
- Maintain triangular relationship
- Vary heights
- Leave space between stones (avoid touching)
- Step back frequently to assess
- Add secondary groups:
- Maintain relationship to primary group
- Create visual flow between groups
- Respect negative space
- Final assessment:
- View from all angles
- Check from primary viewpoint
- Live with it several days before proceeding
- Adjust as needed (while still possible)
Common Mistakes:
- Stones too upright (nature leans stones at angles)
- Even spacing (looks artificial)
- All stones same height (monotonous)
- Too many stones (cluttered)
- Stones touching each other (no breathing space)
Step 13: Gravel Installation
- Add base gravel layer:
- Crushed stone base (5-7cm)
- Compact firmly
- Provides drainage, stable surface
- Add finish gravel layer:
- Pour carefully around stones
- Spread to even 5-7cm depth
- Rake smooth initially
- Avoid disturbing weed fabric
- Initial pattern raking:
- Choose pattern appropriate to design concept
- Begin from farthest point, work toward viewing area
- Around stones: concentric circles or flowing around
- Open areas: parallel lines or waves
- Take your time—this is meditation
Step 14: Optional Additions
Moss (if desired):
- Plant around stone bases
- Requires shade, moisture, appropriate climate
- Species vary by region—consult local experts
- Takes years to establish fully
Stepping Stones (if garden walkable):
- Irregular placement (no straight lines)
- Slightly uneven spacing (natural walking rhythm)
- Each stone stable and level enough to walk safely
- Consider where you want visitors to pause, view
Plantings (if any):
- Minimal—perhaps single pine or maple
- Position to enhance stone composition, not compete
- Allow space to mature without overwhelming
Lighting (optional):
- Uplighting for nighttime viewing
- Subtle, warm tones
- Illuminate key stones or trees
- Avoid over-lighting (mystery in shadow)
Phase 5: Maintenance and Evolution
Daily/Weekly:
- Rake patterns: Re-rake after wind, rain, or when pattern fades
- Remove debris: Leaves, twigs (use soft brush or manual picking)
- Observe: Notice seasonal changes, areas needing attention
Monthly:
- Weed check: Remove any weeds breaking through
- Moss maintenance: Mist in dry weather (if moss present)
- Gravel refresh: Redistribute if settling unevenly
Annually:
- Deep clean: Remove all gravel, clean landscape fabric, replace if degraded
- Gravel top-up: Add new gravel to maintain proper depth
- Stone reassessment: Consider if any adjustments would improve composition
- Moss expansion: Divide established moss to spread (if present)
The Living Garden: A Zen garden isn’t static. It evolves:
- Stones weather, developing patina
- Moss spreads
- Seasons change the atmosphere
- Your understanding deepens, seeing new aspects
As Zen teaches: the garden you create today is not the garden you’ll have in five years—impermanence expressed in stone and sand.
Creating a Desktop Miniature Zen Garden
Don’t have outdoor space? The principles scale perfectly to desktop size.
Benefits of Miniature Gardens
- Accessibility: Anyone can create one
- Cost: Minimal investment ($20-50)
- Portability: Can be moved easily
- Meditation tool: Use raking as active meditation
- Office zen: Bring tranquility to workspace
- Learning: Experiment with principles before larger projects
Materials Needed
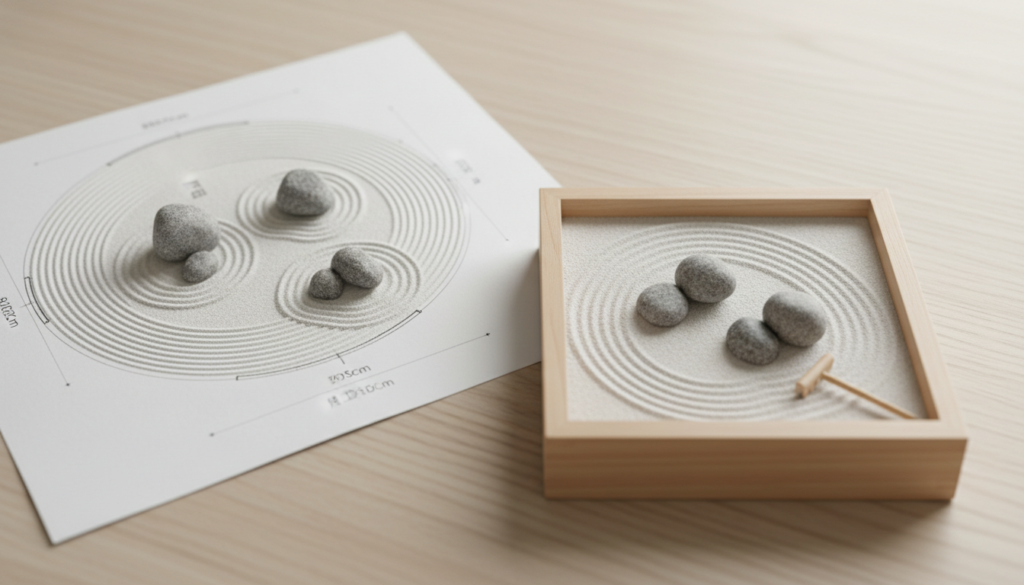
Container:
- Size: 20cm x 30cm minimum, up to 40cm x 60cm
- Material: Wood tray (traditional), ceramic, stone, or plastic
- Depth: 5-7cm minimum
- Color: Natural wood or neutral tones
Where to Find:
- Craft stores (wooden trays)
- Garden centers (shallow planters)
- Online (search “Zen garden kit” or make from scratch)
- DIY: Build from wood (simple rectangle frame)
Sand/Gravel:
- Type: Fine white sand or very fine gravel (1-2mm)
- Quantity: Enough for 3-5cm depth
- Options: Craft sand, aquarium sand (white), fine playground sand
- Amount: 2-5 kg depending on container size
Stones:
- Number: 3-7 stones
- Size: Ranging from 2cm to 8cm
- Type: Smooth river rocks, interesting found stones, purchased specimens
- Characteristics: Varied shapes, colors, textures
Rake:
- Mini rake: Small wooden or bamboo rake
- DIY: Fork, small garden hand fork, or make from wood/bamboo
- Multiple tools: Different patterns possible with different implements
Optional Elements:
- Small figurines (Buddha, monk—use sparingly)
- Tiny plants (succulents if you want living element)
- Candle holder
- Incense holder
Design and Assembly
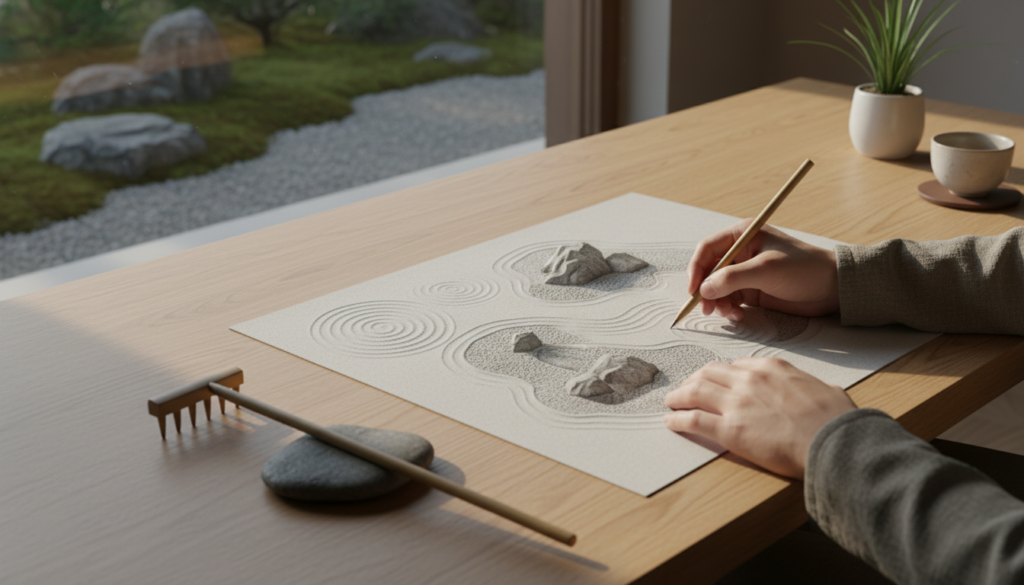
Step 1: Plan Your Composition
Even at small scale, apply principles:
- Decide on arrangement style (mountains in sea? abstract?)
- Sketch rough stone placement
- Consider viewing angle (front-facing or 360°?)
Step 2: Prepare Container
- Clean thoroughly
- Optional: Line with paper or fabric (makes cleaning easier)
- Ensure it’s stable and level
Step 3: Add Sand
- Pour sand to 3-5cm depth
- Distribute evenly
- Smooth surface initially
- Leave about 1cm space from rim
Step 4: Place Stones
Apply design principles at small scale:
- Primary triad: Three main stones forming scalene triangle
- Orientation: Most interesting faces forward
- Burial: Press stones into sand (1/3 buried for stability)
- Groupings: Odd numbers
- Space: Negative space between groups
Composition Suggestions:
Classic Triangle:
- Three stones (large, medium, small)
- Positioned to form triangle
- Largest stone off-center
- Open space representing water/sky
Mountain Range:
- 5-7 stones in decreasing heights
- Suggesting mountain peaks
- Raked patterns as mist/clouds
Island Garden:
- One or two stone “islands”
- Surrounded by “sea” of raked sand
- Concentric patterns as ripples
Step 5: Create Raking Patterns
Basic Patterns:
- Around stones:
- Start at stone edge
- Pull rake in concentric circles
- Spacing gradually widens
- Open areas:
- Parallel lines (suggest still water)
- Wave patterns (suggest flowing water)
- Combination (where circular and linear meet)
- Advanced:
- Experiment with swirls
- Create texture variations
- Let intuition guide
Technique Tips:
- Pull rake toward yourself (easier control)
- Consistent pressure creates even depth
- Lift rake at end of stroke (don’t push back)
- Breath awareness during raking (meditation)
Using Your Miniature Garden
As Meditation Tool:
Morning Practice:
- Sit comfortably before garden
- Take three breaths
- Observe composition for 2-3 minutes (just seeing)
- Rake new pattern (10-15 minutes)
- Observe new creation (2-3 minutes)
- Return to day refreshed
Stress Relief: When feeling overwhelmed:
- Step away from stressors
- Approach garden
- Rake slowly, mindfully
- Focus only on pattern creation
- Notice stress dissolving
Creativity Catalyst: Before creative work:
- Spend 5-10 minutes raking
- Allows mind to settle
- Often insights arise
- Return to work with fresh perspective
Placement Suggestions:
Office Desk:
- Near computer (but safe from keyboard crumbs)
- Visible for quick stress relief
- Personalize workspace
Home Meditation Corner:
- Part of meditation setup
- Combine with cushion, incense
- Create dedicated space
Coffee Table:
- Interactive art
- Conversation piece
- Daily engagement
Maintenance
Daily:
- Rake new patterns (or as desired)
- Remove any debris
- Adjust stones if they shift
Weekly:
- Dump sand, sift to remove debris
- Clean container
- Return sand
- Reassess stone placement (adjust if desired)
Monthly:
- Deep clean
- Replace sand if discolored
- Try new arrangement
Evolution and Experimentation
The beauty of miniature gardens: easy experimentation.
Try Different:
- Stone arrangements: Rearrange monthly
- Sand colors: White, tan, grey, black
- Containers: Various sizes and shapes
- Elements: Add/remove figurines, plants
- Styles: Pure karesansui vs. hybrid forms
Seasonal Themes:
- Spring: Light patterns, uplifting arrangements
- Summer: Flowing patterns suggesting cooling water
- Autumn: Deeper grooves, contemplative arrangements
- Winter: Sparse, stark compositions
Document:
- Photograph favorite arrangements
- Journal about the process
- Note which patterns bring most peace
The Deeper Practice: Garden as Teacher
Beyond aesthetics and technique, Zen gardens offer profound teachings.
What Gardens Teach
Impermanence (Anicca):
- Raked patterns don’t last—wind, rain, time erases them
- Nothing remains static—seasons change, moss grows, stones weather
- This isn’t problem but the point
- Teaching: Appreciate beauty knowing it’s temporary
Non-Self (Anatta):
- Where does the garden end and you begin?
- When raking, are you separate from the rake, the sand, the pattern?
- Practice dissolves subject-object division
- Teaching: Boundaries between self and world are conceptual
Emptiness (Sunyata):
- The gravel represents not just water but emptiness itself
- Negative space makes positive space meaningful
- Nothing has inherent, independent existence
- Teaching: Form is emptiness, emptiness is form
Presence:
- Garden demands being here, now
- Can’t rake while mentally elsewhere
- Beauty visible only to present awareness
- Teaching: This moment is sufficient
Acceptance:
- Can’t control weather affecting patterns
- Stones are as they are, not as we wish
- Work with what is
- Teaching: Fighting reality creates suffering
Simplicity:
- Beauty requires no ornamentation
- Essential forms more powerful than elaborate
- Less is more
- Teaching: Contentment in sufficiency
As Zen garden designer Kinsaku Nakane writes: “The garden is not just scenery—it is a teacher. Every stone, every grain of sand, every pattern speaks of impermanence, interconnection, and the nature of mind itself” (Nakane, 1990, p. 203).
The Raking Practice
Daily raking becomes meditation:
Before Raking:
- Set intention: “I rake to settle the mind”
- Three breaths
- Observe current pattern (what arises?)
During Raking:
- Full attention to movement
- Feel rake in hand
- Hear sand shifting
- See pattern emerging
- When mind wanders, notice, return
- No goal except this stroke, this moment
After Raking:
- Observe completed pattern
- No attachment (“good” or “bad”)
- Appreciate, then let go
- Tomorrow it changes
The Paradox:
- You create the pattern
- Nature destroys the pattern
- Together you create-destroy-create
- This is the dance of existence
Common Questions and Challenges
“I can’t find the right stones!”
Solution: “Right stones” is concept—any stone can work if placed thoughtfully. Start with what’s available. Your eye will develop over time. Many famous gardens use ordinary stones made extraordinary by placement.
“My gravel won’t hold patterns!”
Causes:
- Gravel too large (need 2-5mm size)
- Too round (angular particles grip better)
- Too shallow (need 5cm minimum depth)
Solutions:
- Replace with finer gravel
- Mist lightly to help hold pattern temporarily
- Mix small amount of sand with gravel
“It looks artificial and forced!”
This is common initially. Solutions:
- Live with it longer—familiarization changes perception
- Adjust stone orientations (lean more, vary angles)
- Increase spacing between elements
- Remove one stone (often overcrowding causes artificial feel)
- Study photographs of natural rock formations
“I feel like I’m just copying famous gardens!”
Response: Learning any art involves imitation before innovation. Copy famous gardens to understand principles, then let your own expression emerge. As Suzuki Roshi taught: “In the beginner’s mind there are many possibilities, but in the expert’s there are few” (Suzuki, 1970, p. 21). Stay beginner’s mind.
“How do I know when it’s ‘done’?”
Zen response: It’s never done—gardens evolve. But practical answer: When removing anything would diminish it, and adding anything would clutter it. When you can sit with it in peace. When it invites contemplation rather than critique.
“Can I include [non-traditional element]?”
Question to ask: Does it serve the garden’s contemplative purpose? Does it honor the principles while expressing your voice? If yes, include it. Zen gardens aren’t museums—they’re living practice spaces.
Conclusion: Stones, Sand, and Silence
We’ve journeyed from the historical origins of Zen gardens through the symbolic language of stones and gravel, explored design principles refined over centuries, studied masterpieces that inspire, and learned to create our own contemplative spaces—whether expansive outdoor sanctuaries or intimate desktop compositions.
But understanding Zen gardens intellectually differs vastly from experiencing them. The true teaching comes not from reading about gardens but from:
- Standing before them in silence
- Feeling gravel beneath the rake
- Watching shadows shift across stones
- Sitting with the question they pose without demanding answers
As Marc Peter Keane beautifully expresses: “The garden will change you before you change it” (Keane, 1996, p. 186).
Whether you create a full-scale outdoor garden or a simple desktop arrangement, whether you visit famous gardens or simply study photographs, let these spaces become teachers. They offer lessons about:
- Finding beauty in simplicity
- Accepting impermanence
- Appreciating negative space
- Being present with what is
- Letting go of attachment
The fifteen stones at Ryōan-ji have sat in silence for five hundred years. They’ve witnessed countless visitors, seasons, storms. They’ve taught without words. They continue teaching.
Your garden—large or small, elaborate or simple—can do the same.
Begin with stone. Add sand. Create space. Then sit. Breathe. Be present.
The garden reveals its teaching not through explanation but through silence.
Listen.
Resources for Further Study
Essential Books:
- Keane, M. P. (1996). Japanese Garden Design. Rutland, VT: Charles E. Tuttle.
- Nitschke, G. (1993). Japanese Gardens: Right Angle and Natural Form. Cologne: Taschen.
- Itoh, T. (1998). The Gardens of Japan. Tokyo: Kodansha International.
- Inaji, T. (1998). The Garden as Architecture: Form and Spirit in the Gardens of Japan, China and Korea. Tokyo: Kodansha International.
On Zen and Gardens:
- Suzuki, D. T. (1959). Zen and Japanese Culture. Princeton, NJ: Princeton University Press.
- Hisamatsu, S. (1971). Zen and the Fine Arts. Tokyo: Kodansha International.
Gardens to Visit:
In Japan:
- Ryōan-ji Temple, Kyoto (ultimate karesansui)
- Daisen-in, Daitoku-ji, Kyoto (narrative composition)
- Ginkaku-ji, Kyoto (sand sculptures)
- Tōfuku-ji Hōjō, Kyoto (modern interpretation)
Outside Japan:
- Portland Japanese Garden, Oregon (authentic multi-style)
- Brooklyn Botanic Garden Japanese Garden, New York
- Anderson Japanese Gardens, Illinois
- Tenshin-en, Boston (contemporary karesansui)
Online Resources:
- Japanese Garden Database
- Marc Peter Keane’s website (mpkeane.com)
- Shunmyo Masuno’s works (contemporary Zen priest-designer)
References
Inaji, T. (1998). The Garden as Architecture: Form and Spirit in the Gardens of Japan, China and Korea. Tokyo: Kodansha International.
Keane, M. P. (1996). Japanese Garden Design. Rutland, VT: Charles E. Tuttle Company.
Masuno, S. (2001). Zen Gardens: The Complete Works of Shunmyo Masuno. Tokyo: Tuttle Publishing.
Nakane, K. (1990). Kyoto Gardens. Osaka: Hoikusha Publishing.
Nitschke, G. (1993). Japanese Gardens: Right Angle and Natural Form. Cologne: Taschen.
Suzuki, D. T. (1959). Zen and Japanese Culture. Princeton, NJ: Princeton University Press.
Suzuki, S. (1970). Zen Mind, Beginner’s Mind. New York: Weatherhill.