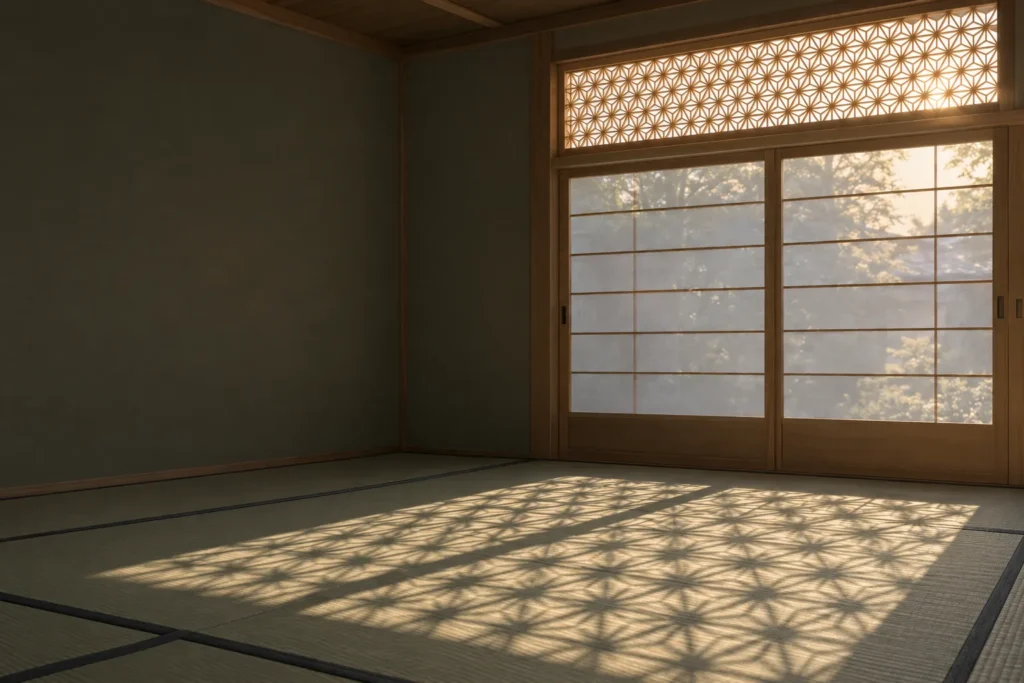
In the late afternoon, sunlight passes through a paper screen in a Japanese room and falls across the floor in a soft, geometric pattern of six-pointed stars. Look closely at the screen and you will see where the pattern comes from: hundreds of slender strips of wood, each no thicker than a pencil, locked together into a lattice so precise that it holds without a single nail or drop of glue.
This is kumiko (組子), the Japanese craft of assembling small, precisely cut pieces of wood into decorative lattices. The name combines kumu (組む, “to join” or “to assemble”) and ko (子, “child” or “small piece”). Kumiko developed as a branch of traditional Japanese woodworking and joinery, used in sliding screens, transoms, and furniture, and it has recently found a large new audience among woodworkers around the world.
This guide explains what kumiko is, why it matters in Japanese design, where it came from, what its classic patterns mean, how to start making it yourself, and where to see the finest work in Japan.
What Is Kumiko?
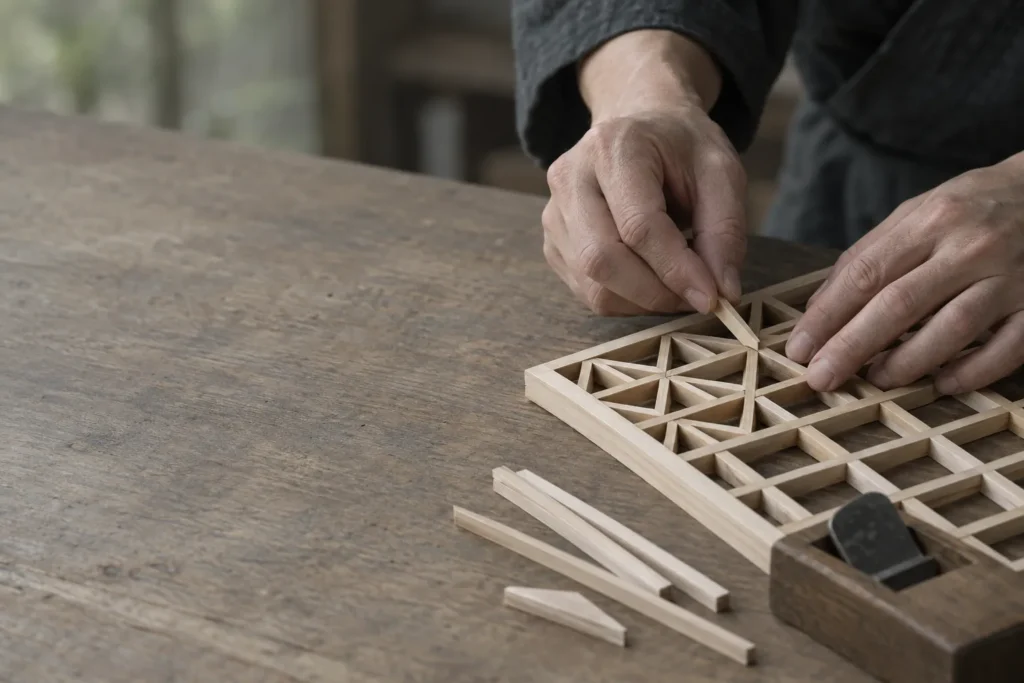
Kumiko work is built in two layers. First comes the jigumi (地組), the base grid: a framework of thin strips, notched halfway through so they cross and interlock, usually in squares, diamonds, or triangles. Then the maker fits smaller pieces, the kumiko proper, into each opening of the grid. These pieces are cut at precise angles and bent or pressed into place, where friction and tension alone hold them. The finished panel behaves almost like a single board of wood, even though it may contain hundreds or thousands of parts.
What makes this possible is accuracy. Each strip has to be planed to an exact, uniform thickness, and every angled cut has to meet its neighbor without a gap. A piece that is even slightly too long will warp the panel; one that is slightly too short will fall out. Professional makers in Japan speak of working to tolerances that are hard to see with the naked eye, and they rely as much on the feel of the plane and the sound of the wood as on measuring tools.
This is why kumiko is often described as meditative. There is no way to rush it. The work is repetitive, exact, and quiet, and the reward comes only at the end, when the last piece slides into place and the pattern suddenly becomes whole.
Why Kumiko: Wood as a Filter for Light
Kumiko is often admired for its geometry, but its original purpose was practical: it is a way of controlling light and air.
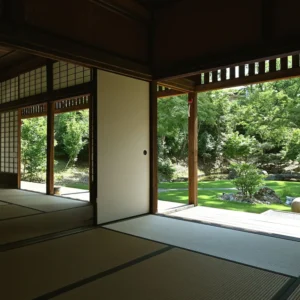
In traditional Japanese architecture, rooms were divided by sliding screens rather than solid walls. A shoji (障子) screen uses a wooden lattice covered with translucent paper, and the lattice does two jobs at once. It holds the fragile paper taut, and it breaks incoming daylight into a gentle, even glow. The same principle appears in the ranma (欄間), a decorative transom set above sliding doors. A ranma filled with kumiko lets light and air move between rooms while keeping the spaces visually distinct.
The more elaborate the lattice, the more it shapes the light. A plain square grid gives a calm, orderly glow. A dense asanoha pattern breaks the light into many small triangles, so the screen seems to shimmer as the sun moves. Kumiko makers think about the shadow a panel will cast as much as the panel itself, which is why kumiko looks most alive when light is passing through it.
This attention to light connects kumiko to the wider Japanese sensibility of quiet, indirect beauty. In a tea room, for example, the host controls daylight through shoji so that guests see the bowl, the flowers, and each other in a soft, shadowed light. Kumiko is one of the tools that makes that atmosphere possible.
A Brief History of Kumiko
Wooden lattices have a long history in Japanese buildings. According to the Japanese encyclopedia Nipponica, lattice transoms already appear in Heian-period temple halls such as the Phoenix Hall of Byōdō-in (1053), first as simple grids of vertical and horizontal bars and, by the twelfth century, as diagonal diamond lattices. Paper-covered akari shoji, the translucent screens familiar today, first appear in paintings from the end of the Heian period and spread widely through medieval houses. In the Edo period (1603–1868), as the refined sukiya style of architecture developed, the ways of arranging shoji lattices grew far more varied, and from the end of the Edo period into the Meiji era, lattices with pictorial motifs appeared and pattern books were published. The craftsmen who made these screens were tateguya (建具屋), specialist makers of sliding doors and screens.
Kumiko survived Japan’s rapid modernization largely through regional craft communities. The best known today is Ōkawa in Fukuoka Prefecture, a city with a long history of furniture making. According to ACROS Fukuoka, which promotes the prefecture’s traditional crafts, Ōkawa kumiko has a history of about 300 years and includes more than 200 designs, with some panels made from tens of thousands of individual parts. The Governor of Fukuoka Prefecture has designated Ōkawa kumiko as one of the prefecture’s specialty crafts.
In recent decades, as fewer Japanese homes were built with traditional screens, kumiko makers turned to new forms: lamps, wall panels, coasters, boxes, and furniture. At the same time, woodworkers outside Japan discovered the craft through books, videos, and online communities. For many of them, kumiko has become a way into Japanese hand-tool woodworking: small enough to try at home, demanding enough to practice for years.
Kumiko Patterns and Their Meanings
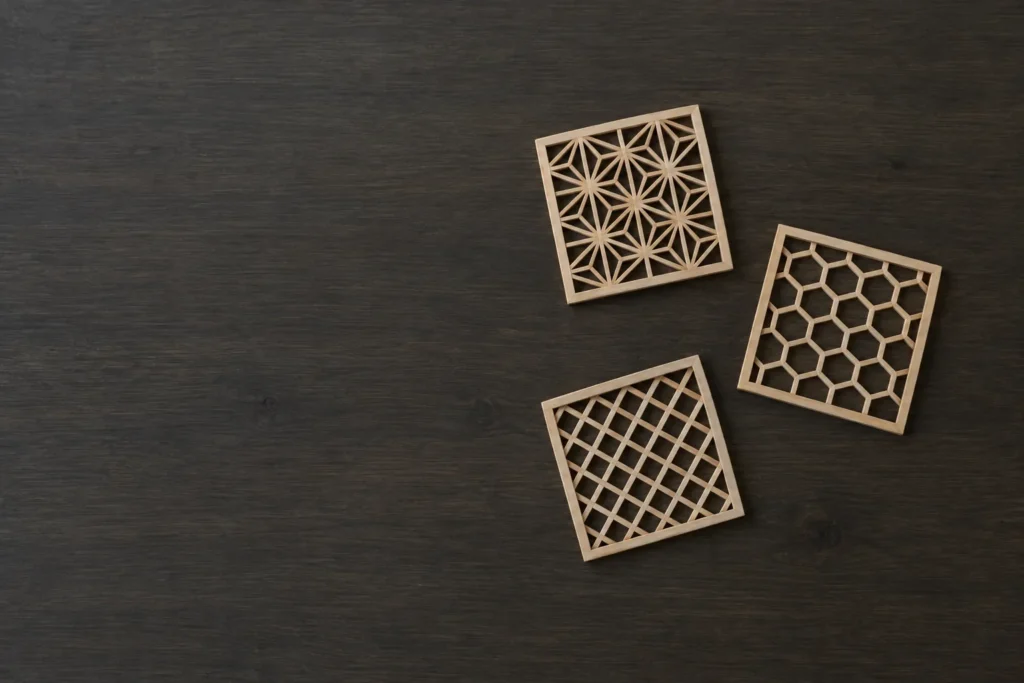
Kumiko patterns, like many traditional Japanese designs, often carry wishes or associations. Many of them also appear in textiles, ceramics, and sashiko (刺し子) stitching, so learning them opens up a whole visual vocabulary of Japanese design. Here are the base grid and four patterns that beginners meet early.
Mitsukude (三つ組手): The Triangle Grid
Many classic patterns, including the traditional asanoha, are built on a grid of three thin strips joined precisely to form equilateral triangles. This technique, known as mitsukude (三組手), is the foundation for a large family of designs; according to Shimane Prefecture, joiners have handed it down since the Kamakura period (1185–1333). It is also harder to make than a square grid, because three strips must interlock at a single point.
Asanoha (麻の葉): Hemp Leaf
The most famous kumiko pattern is a six-pointed star formed by triangles, said to resemble hemp leaves. Hemp grows tall and straight with little care, so the pattern came to stand for healthy growth. As Nippon.com’s guide to traditional patterns notes, it was often used for babies’ and children’s clothing as a wish for their strong, upright growth.
Kikkō (亀甲): Tortoise Shell
A hexagonal pattern modeled on the plates of a tortoise shell. Because the tortoise is a traditional symbol of long life in East Asia, kikkō is considered an auspicious pattern associated with longevity.
Shippō (七宝): Seven Treasures
Overlapping circles create a pattern of interlocking rings with no beginning or end. The name refers to the “seven treasures” of Buddhist scripture, and the design is associated with harmony, good relationships, and prosperity across generations. In kumiko, the curves are suggested with straight pieces, which makes shippō a good test of a maker’s skill.
Sakura (桜): Cherry Blossom
Five-petaled cherry blossoms are formed by fitting small pieces into a triangle or hexagon grid. The cherry blossom is Japan’s best-known symbol of spring and of the beauty of things that do not last, the feeling Japanese culture calls mono no aware (物の哀れ).
Many makers combine several patterns in one panel, framing a dense asanoha center with a border of plainer squares or diamonds. Combining patterns is where kumiko shifts from technique to design.
How to Start Making Kumiko
You do not need a traditional Japanese workshop to try kumiko. Many hobbyists begin with a small project, a few hand tools, and a simple jig.
Your First Project
Start small. A coaster or a single square panel of about 10 to 15 centimeters (4 to 6 inches) lets you learn the basic grid and one or two patterns without committing weeks of work. A common first pattern is asanoha laid out on a square grid, which is simpler to make than the traditional triangular version. Once you can make one clean panel, you can repeat it to build a larger piece or set it into a frame for a lamp or wall hanging. If you would rather not mill your own strips at first, a beginner’s kit with pre-cut strips and a pattern guide is the easiest way in.
Wood
Japanese makers traditionally use straight-grained softwoods such as hinoki (Japanese cypress) and sugi (Japanese cedar), which plane cleanly, bend slightly without breaking, and smell wonderful as you work. Outside Japan, basswood, western red cedar, and other fine-grained, knot-free woods are popular substitutes. Choose wood that is dry and stable, and buy a little more than you need, because you will learn by making mistakes. Keep your offcuts: in the spirit of mottainai (もったいない), small pieces left over from one project often become the parts of the next.
Tools and Jigs
The essentials are modest: a fine-toothed saw, a sharp chisel, a small plane, accurate measuring tools, and a cutting board or bench hook. Many kumiko makers also use a small hand plane set in a guide to trim each piece to its final angle. Because so many pieces must be cut to identical angles, a jig is the most important tool of all. A kumiko jig holds each strip at a fixed angle, usually 30, 45, 60, or 67.5 degrees depending on the pattern, so that you can trim it repeatedly to the same shape. Some woodworkers build their own jigs, and many buy ready-made ones to start.
Learning the Craft
Kumiko rewards patience over speed. Expect your first panels to have gaps and loose pieces; each one will be tighter than the last. Work slowly, check each piece against the grid before trimming it, and remember that it is easier to take off a little more wood than to put it back.
A few mistakes catch almost every beginner. The first is uneven strips: if the strips in the base grid differ even slightly in thickness, the notches will not line up and the whole grid will twist. Take time to plane every strip to the same dimension before cutting any joints. The second is cutting pieces too short. Because kumiko pieces are held by tension, a piece should be trimmed until it fits snugly, then trimmed again only if it truly will not go in. The third is forcing pieces into place. If a piece needs a hammer, it is too long; pressing it in will crack it or push neighboring pieces out of position. Finally, many beginners try a complex pattern too early. Make several plain panels first. The skills that matter most in kumiko, accurate planing and consistent angles, are the same in every pattern.
The most thorough English-language guides are by Desmond King, a woodworker who trained in Japan and later wrote a series of books on shoji and kumiko. His first volume, Shoji and Kumiko Design: Book 1 The Basics, walks through tools, wood preparation, and the construction of basic patterns step by step.
Kumiko Today
Kumiko has moved well beyond the shoji screen. In Japan, makers now produce kumiko lamps, wall art, trays, and furniture panels, and the craft appears in hotel lobbies, restaurants, and even the interiors of luxury trains. Outside Japan, kumiko panels have become a natural fit for minimalist interiors and Japandi design, where warm wood and filtered light soften clean lines.
A kumiko lamp is perhaps the clearest example of the craft’s purpose. When the light inside is switched on, the lattice disappears into the pattern of light it creates, and the room fills with the same soft geometry that once fell across tatami floors through shoji screens.
Choosing a Kumiko Piece
If you would rather buy kumiko than make it, a few points help you tell fine work from imitation. First, look at the joints. In true kumiko, every piece is a separate strip of wood fitted into a grid, so you can see tiny seams where pieces meet. A panel cut from a single sheet with a laser or router may look similar from a distance, but it has no joints at all; it is a different craft, and it should cost much less. Second, check the wood. Good kumiko uses clear, straight-grained timber without knots, and the color is consistent across the panel. Third, hold the piece up to the light. Well-made kumiko has crisp, even gaps and a uniform shadow; loose or uneven pieces show immediately. For lamps, ask what kind of light source is used, since modern LED fittings run cool and are kinder to the wood than older bulbs.
Where to See Kumiko in Japan
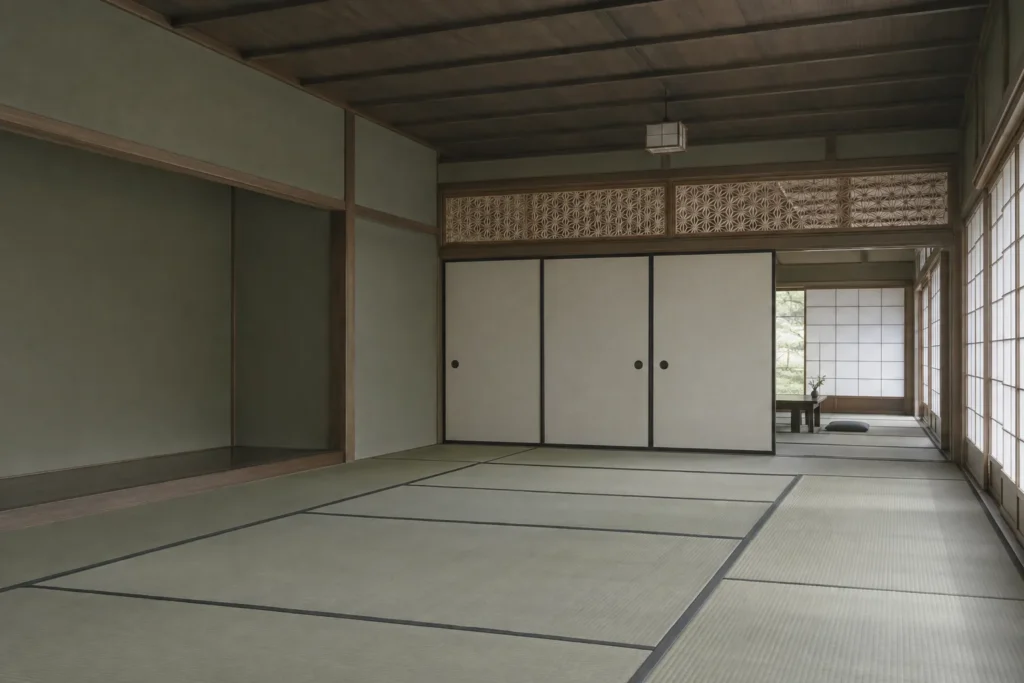
The best way to appreciate kumiko is to see it with light passing through it.
- Ōkawa, Fukuoka Prefecture. The center of Ōkawa kumiko, in the south of the prefecture next to the canal town of Yanagawa, which is reached from Fukuoka City on the Nishitetsu Tenjin Ōmuta Line. Local workshops and showrooms display panels and furniture, and some offer hands-on experiences. For an overview of the craft, see the page on Ōkawa kumiko published by ACROS Fukuoka.
- Temples and traditional inns. Many temples and ryokan (traditional inns) feature kumiko in their ranma and shoji. Look up above the sliding doors of a reception room: the transom is often the most elaborate piece of joinery in the building.
- Craft shops and department stores. In larger cities, traditional craft shops and department store craft floors often carry kumiko coasters, lamps, and panels, which make thoughtful souvenirs.
Wherever you see it, take a moment to look at the shadow as well as the lattice. That play of light is what generations of makers have been working toward, and it changes with every hour of the day.
FAQ
Q: What is kumiko?
A: Kumiko (組子) is a Japanese woodworking craft in which thin, precisely cut strips of wood are fitted together into decorative lattice patterns without nails or glue. It was traditionally used in shoji screens and ranma transoms, and today it also appears in lamps, wall panels, and furniture.
Q: Do you need glue for kumiko?
A: No. Traditional kumiko is held together entirely by precise joinery and the tension of the fitted pieces. The base grid interlocks with half-lap joints, and the smaller pieces are pressed into the openings so tightly that friction holds them in place.
Q: What wood is best for kumiko?
A: Japanese makers traditionally use straight-grained softwoods such as hinoki (Japanese cypress) and sugi (Japanese cedar). Outside Japan, basswood and western red cedar are popular because they are fine-grained, easy to plane, and slightly flexible.
Q: What does the asanoha pattern mean?
A: Asanoha (麻の葉), the hemp-leaf pattern, is a six-pointed star formed by triangles. Because hemp grows tall and straight with little care, the pattern represents healthy growth, and it was traditionally used on children’s clothing as a wish for their strong, upright growth.
Q: Is kumiko hard to learn?
A: The basics are approachable. A simple coaster or small panel can be made with a few hand tools and a jig. Mastery takes years, because complex patterns require extremely precise cutting, but many hobbyists find the slow, repetitive work deeply satisfying from the start.
References
- ACROS Fukuoka. (n.d.). Okawa kumiko wood joinery. ACROS Fukuoka.
- Fukuoka Prefecture. (n.d.). 福岡県の伝統工芸品 (Traditional crafts of Fukuoka Prefecture). Fukuoka Prefecture.
- Hirai, K. (n.d.). 障子 (Shoji). In Nihon daihyakka zensho (Nipponica). Shogakukan.
- King, D. (2011). Shoji and kumiko design: Book 1, The basics. D and M King.
- Kudō, Y. (n.d.). 欄間 (Ranma). In Nihon daihyakka zensho (Nipponica). Shogakukan.
- Nippon.com. (2019, June 17). 日本の伝統文様 (Traditional Japanese patterns). Nippon.com.
- Shimane Prefecture. (n.d.). 組子細工 (Kumiko craft). Shimane Prefecture.